How to Empty Your Recycle Bin on a Schedule on Windows 10
How to Empty Your Recycle Bin on a Schedule on Windows 10: Using a built-in feature called Storage Sense, you can save disk space by configuring Windows 10 to delete files of a certain age located in your Recycle Bin automatically every day, week, or month. Here’s how to set it up.
First, launch “Settings” by opening the “Start Menu” and clicking the “gear” icon on the left. You can also press Windows+I to open Settings quickly. In Settings, click the “System” icon and then click “Storage.”
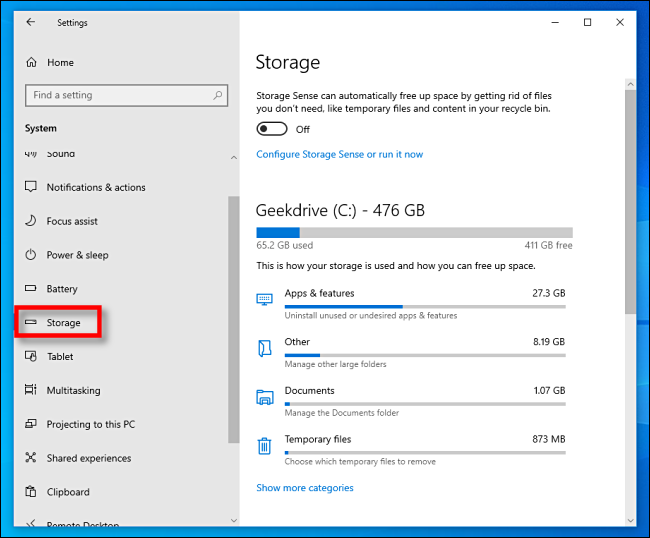
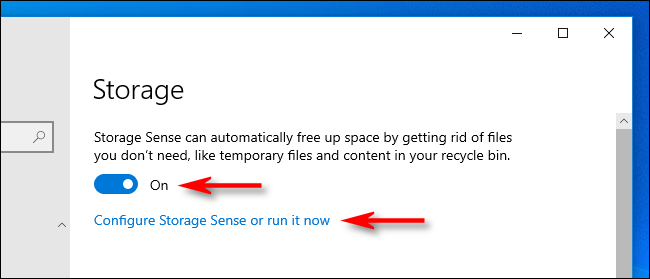
At the top of the Storage options, you’ll see a small paragraph of text about Storage Sense. Click the sliding switch located just below to set it to the “On” position. Then under that, click “Configure Storage Sense or run it now.”
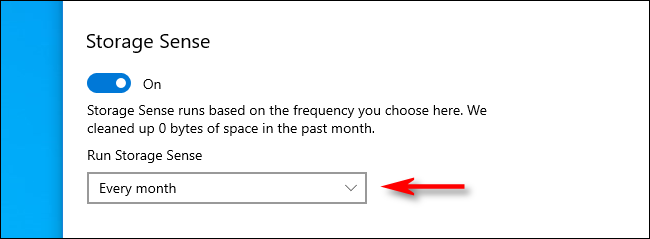
In the “Storage Sense” options, you’ll want to take note of a few different settings. The first is the frequency of when Storage Sense runs, which is set with a drop-down menu labeled “Run Storage Sense.” You can set it to run every day, week, or month—or whenever disk space is low. Click the menu, and select the option that works best for you.
RELATED: Can You Move Windows 10’s Notification Pop-ups?
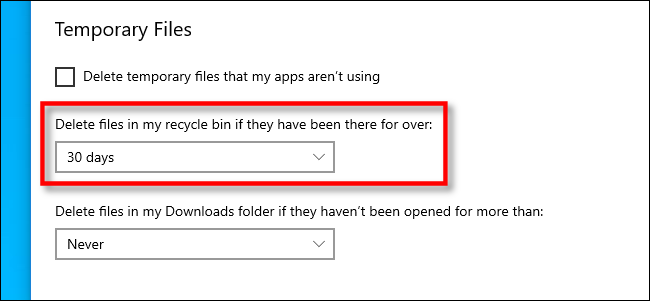
Because we’re only talking about deleting files in the Recycle Bin, uncheck the box beside “Delete temporary files that my apps aren’t using” if you don’t want Storage Sense removing old temporary files. Also, if necessary, set the “Delete files in my Downloads folder” option to “Never” using the drop-down menu.
In-between those, you’ll find a drop-down menu labeled “Delete files in my Recycle Bin if they have been there for over,” and the options are “Never,” “1 day,” “14 days, “30 days,” or “60 days.”
Here’s how it works: whenever Storage Sense is run (as per the earlier setting), it will automatically delete files that have been sitting in your Recycle Bin for longer than that period of time. Using the menu, set it to whichever option you’d like.
After that, you’re free to close Settings.
If you ever change your mind about the frequency of the Recycle Bin emptying (or want to disable it), just revisit Settings > Storage again and set Storage Sense to “Off.” Or, you can change the interval options again to suit your needs.


Leave a reply