How to Control the Exposure in the iPhone’s Camera App

The iPhone’s user-friendly Camera app makes it possible for anyone to take great photos. But the app doesn’t get it right every time, and sometimes you might want to brighten or darken your scene.
To do that, you’ll need to use the Exposure Compensation dial. Apple added it in the iOS 14 update, released in September 2020. This built-in feature works on the iPhone 11, iPhone 11 Pro, and newer iPhones. On older iPhones, you’ll have to use a third-party camera app.
How to Enable Exposure Compensation
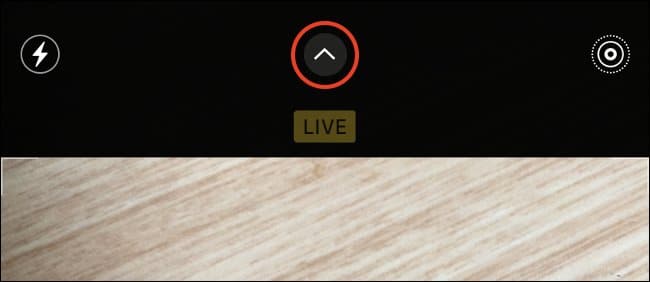
To enable the Exposure Compensation dial, launch the Camera app, and tap on the arrow at the top of the viewfinder (in portrait orientation).
If you don’t see the arrow, it’s possible that you haven’t yet updated your iPhone to the latest version of iOS.
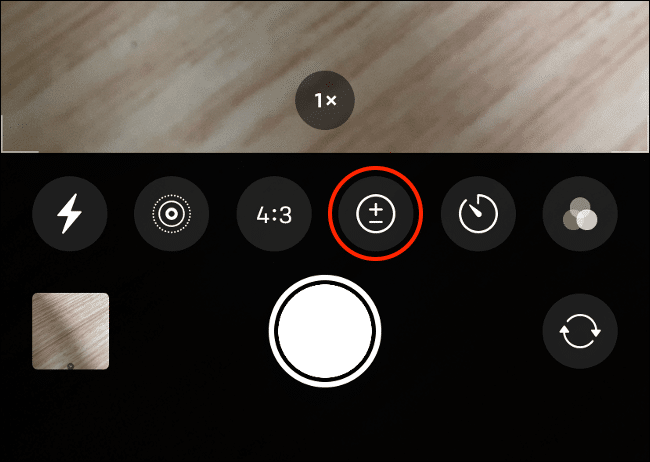
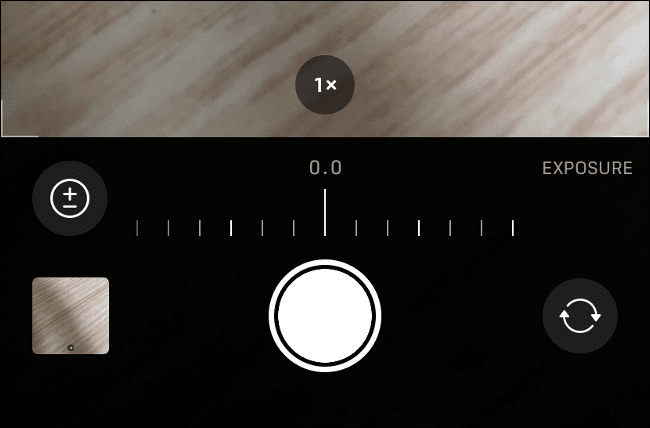
A row of icons will appear just above the shutter button. The Exposure Compensation slider is the plus/minus (+/-) icon. Tap on it and a new slider will appear along the bottom of the frame.
If you don’t have an iPhone 11 or newer, you won’t see this option as it’s not available on older devices.
You can now move the slider left and right to decrease or increase the amount of light in your scene.
If you tap on the plus/minus (+/-) again, you will get back to the main row of icons. You can close the menu using the arrow at the top of the viewfinder. Keep in mind that, if you set an exposure compensation value, it will persist until the next time you open the camera app—even if you close this menu.
Using Exposure Compensation for Better Photos
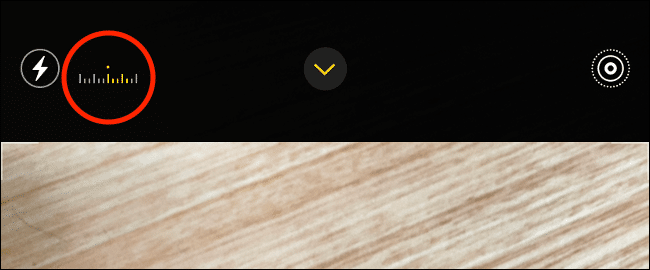
When you’ve set your exposure manually using this slider, you will see a small meter in the top-left corner of the (portrait) screen. This will update as you move the camera around to indicate whether or not your image is too bright or too dark.
Ideally, you want this meter to stay in the middle. Too far to the right means your image is overexposed, and too far to the left means it is underexposed. The meter will go red to indicate that the image is way too dark or too bright, and in the case of darkness, you can opt to enable Night Mode via the moon icon.
The Exposure Compensation feature added in iOS 14 isn’t full manual control, but fine-tuning of a scene. As you move around the Camera app will continue to adapt to lighting conditions unless you manually lock exposure and focus. It’s an effective way to get more control over the image without having to go fully manual.
A good example of when you might want to use this feature is taking a picture of a subject in front of a bright background like a sunset. You can let your iPhone’s face detection handle focus and reduce the Exposure Compensation dial just enough to capture the colors of the sunset.
Lock Exposure and Focus for More Control
The Exposure Compensation dial is for fine-turning your scene, but the iPhone Camera app also allows you to fully lock focus and exposure. To do this, tap and hold on a part of the viewfinder until you see “AE/AF Lock” appear at the top of the screen.
With focus locked on the area you tapped, you can now tap and drag your finger inside the yellow box to increase exposure. This gives you much more control over the total light in your scene, allowing you to massively under or over-expose if you’re not careful.
With “AE/AF Lock” displayed on the screen, the Camera app will not refocus or adjust to changing light conditions. You can still use the Exposure Compensation dial to fine-tune your photo if you want.
If your iPhone is older than the 11 or 11 Pro, this is your only option for manually changing exposure value.
Only on iPhone 11, 11 Pro, and Newer Devices
If you own an iPhone XS, XR, or earlier, you won’t be able to access the Exposure Compensation dial. You’ll have to make do with the old method of doing things, which means locking focus and exposure to a single point and then making micro-adjustments inside the yellow box.
If you aren’t fond of that method, there is a large selection of camera apps that feature full manual control. If you have an older device and want to set exposure and focus separately in a more intuitive way, try VSCO, Manual, or Camera+ 2.
Do you shoot primarily on an iPhone? Don’t forget to check out a few simple photography tips that will make your smartphone photography even better.






Leave a reply