
How to Automatically Move Gmail Messages to a Different Tab
Emails can get out of hand very quickly. If you want to keep your Gmail inbox tidy, make sure your emails go to the desired inbox tab by creating rules (called “filters”) for them. Here’s how it’s done.
Manually Move Emails to Other Tabs
Google does a pretty great job of sorting emails between the auto-sorted inbox tabs (Primary, Social, Promotions). But you may want to have one of your favorite newsletters that keeps getting tucked away in the Promotions tab sent to the Primary tab instead so that you never miss it.
Doing this is as easy as dragging and dropping the email from one tab to another. First, log in to your Gmail account on your desktop. Once you’re logged in, click the inbox tab that contains the email that you want to relocate.
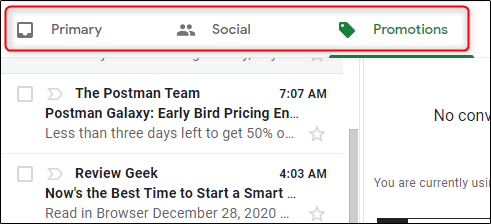
Next, just drag and drop the email that you want to move to a different tab. For example, if a newsletter generally goes to the Promotions tab, you might want to move it. To move the email to the Primary tab, just drag and drop the email to the “Primary” tab.
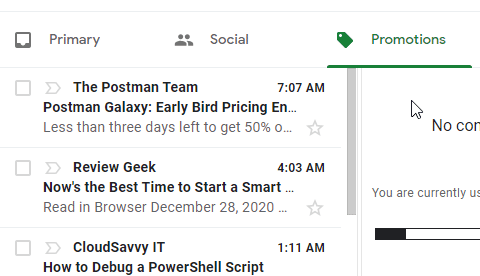
Once it’s been moved, a toast message will appear letting you know that the conversation was moved to the destination tab. It will also ask you if you want to move future messages from the sender to the same tab. Click “Yes.”

Now, all future emails from that sender will automatically be sorted to the desired tab. However, if you want to do the same for existing emails, you’ll need to create a filter.
Create Email Filters
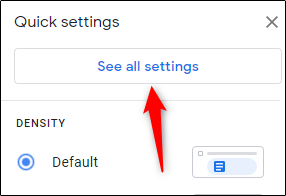
You can create filters to automatically move emails to different inbox tabs. To do this, click the gear icon in the top-right corner of the window.
![]()
In the “Quick Settings” menu, click “See All Settings.”
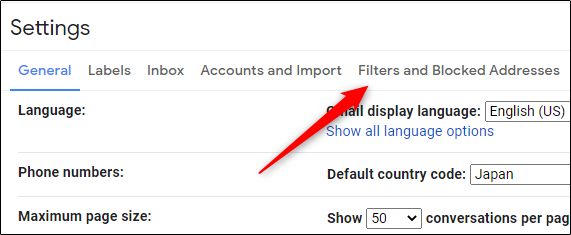
You’ll now be in Gmail’s “Settings” menu. Here, click the “Filters and Blocked Addresses” tab.
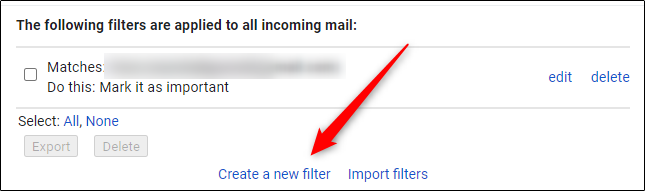
In the “Filters and Blocked Addresses” tab, there will be two sections. In the filter section, click “Create a New Filter.”
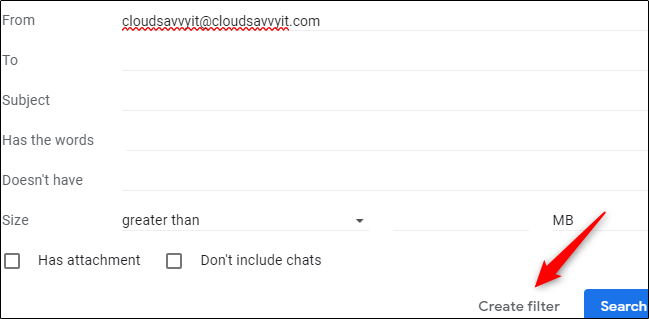
Once that’s been selected, a new menu will appear. Here, fill out the criteria for the emails that you want to move:
- From: Specify the sender of the email.
- To: Specify the recipient of the email.
- Subject: Words in the subject of the email.
- Has the Words: Messages that contain certain keywords.
- Doesn’t Have: Messages that don’t contain certain keywords.
- Size: Emails larger or smaller than a certain size (in bytes, KB, or MB).
- Has Attachment: Emails that contain attachments.
- Don’t Include Chats: Exclude chats from the filter.
Once you’ve input the filter criteria, click “Create Filter.”
Next, you’ll need to specify where to move the email when your criteria are met. At the bottom of the window, check the box next to “Categorize As” by clicking it, then select the down arrow to display a drop-down menu.
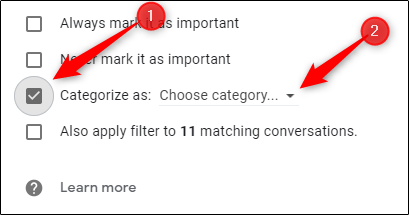
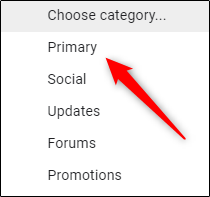
Choose the category that you’d like the emails to be delivered to. We’ll choose the “Primary” inbox tab in this example.
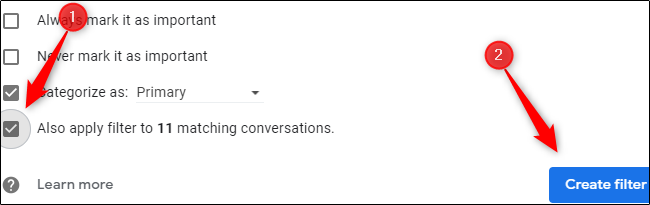
Note: This filter only applies to incoming emails. If you want it to apply to existing emails, check the box next to “Also apply filter to # matching conversations” by clicking it.
Finally, click “Create Filter.”
You’ll then receive a notification stating that your filter was successfully created.
Though certainly a huge step toward organizing your inbox, this is just the beginning. Next, consider creating new folders (known as “labels” in Gmail) and setting rules to have emails placed in those labels as well.


Leave a reply