How to Use Multiple Email Signatures in Gmail
An email signature is an important way to quickly add a personalized touch to the end of every email you send. But different types of emails call for different signatures. Set up several signatures in your Gmail for work, friends, and family.
How to Create Multiple Signatures in Gmail
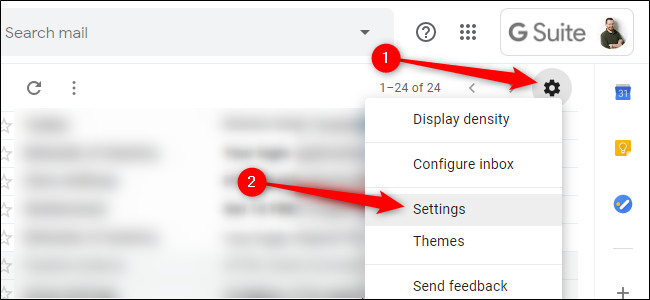
To get started, open Gmail’s Settings menu by clicking on the cog icon in the top right and selecting “Settings.”
Under the General tab, scroll down to “Signature.” Your existing signature will be automatically displayed as “My Signature.” To edit a signature, click the pencil icon next to it. Delete a signature with the trash can icon next to that.
Click “Create New” to add a new signature to your list .
In the text box that pops up, type a name for your new signature, and click “Create.”
Then, while that signature is selected, type or paste the content for your signature into the empty text box on the right. Customize your Gmail signature by adding images, formatting the text, or creating hyperlinks. Repeat this process for signatures in different languages, to different audiences, or for replies that may not require a full signature.
How to Manage Multiple Signatures in Gmail
This feature also allows you to create and edit the signatures you’ve created for different email accounts if you’re using Gmail’s “Send Mail As” feature. Under the Signature Defaults section of the General Settings tab, open the drop-down menu that’s displaying your current email address. Select the desired email address to access the signatures for that account. This setting is only accessible if you have multiple email addresses combined under one Gmail account.
You can also set your Gmail default signature here. Use the two drop-down boxes under Signature Defaults to set one default signature for new emails and one for replies and forwards.
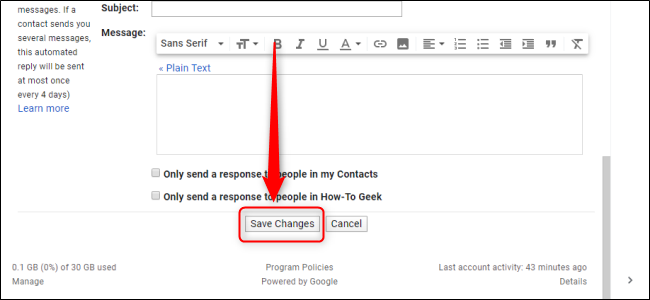
When you’re finished, scroll down to the bottom of the Settings page and click “Save Changes.”
How to Switch Between Signatures in Gmail
To change your signature while writing an email, click on the three vertical dots at the bottom-right corner of the email pane, hover your mouse over “Insert Signature,” and select the signature you want to use.
Click “Manage Signatures” to be taken to the Signature menu where you can create, edit, and remove signatures, as described above.
Like many features that Google rolls out to its customers, not everyone may have access to it immediately. Your organization may need a G Suite account set to the Rapid Release track.


Leave a reply