
6 Uses for Your Spare iCloud Storage
Apple gives you 5 GB of free iCloud storage, but that doesn’t go very far. If you want to back up your iPhone or store media on iCloud, you’ll probably need to upgrade to the 50 GB, 200 GB, or 2 TB tier.
But that’s a lot of space! What else can you use all that extra storage for?
Back-Up All Your Devices
With enough iCloud storage, you can back up all your supported devices, including your iPhone, iPad or iPad Pro, Apple Watch, and iPod Touch. You can’t back up your entire Mac on iCloud right now, but you can store your Documents and Desktop folders there.
Once you’ve upgraded your storage plan, grab your iPhone or iPad and head to Settings > [Your Name] > iCloud > iCloud Backup to enable the service. Do this for all your supported gadgets. iCloud will then perform a backup whenever you plug in your device, and it’s connected to Wi-Fi on a locked screen.
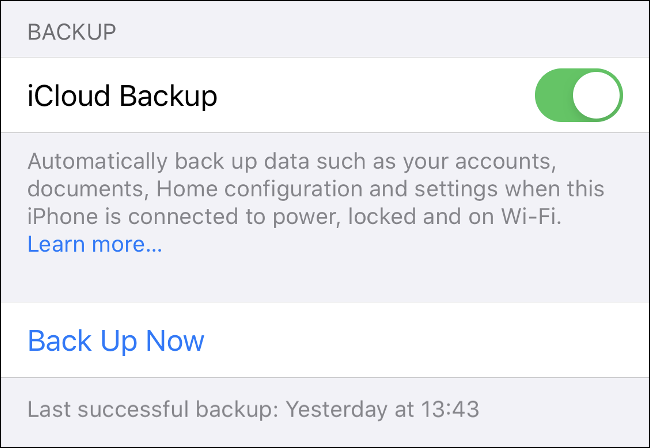
iCloud backs up all your important information, including app data, settings, home screens, Apple Watch, message history, ringtones, purchase history, and personal media. If you have iCloud Photo Library turned on, your photos and videos are already backed up.
To restore from a backup, you’ll need to reset and erase your device under Settings > General > Reset. Tap “Restore from iCloud Backup” when your device restarts and wait for the restoration to complete. How long this will take depends on the speed of your internet connection.
Don’t forget, you can also back up your iPhone and iPad locally with iTunes. Local backups are ideal for quickly transferring the contents of one device to another, like when you replace your iPhone with a new model. Cloud backups serve as an emergency precaution just in case you lose or break your device.
Use iCloud Photo Library to Store Photos and Videos
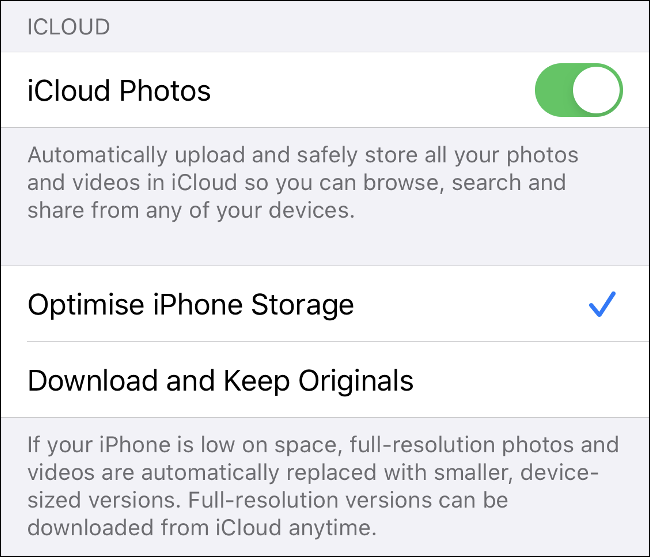
iCloud Photo Library uploads all your photos and videos to the cloud so you can access them on any device. You can then free up space on your iPhone by storing “optimized,” low-resolution versions of your images locally, and leaving the high-resolution originals on the cloud.
When you want to view your photos, iCloud will automatically download the better-quality versions (you can also request the originals whenever you need them). The service allows you to store both photos and videos, which can make a huge difference in a crowded device.
Keep in mind, however, that streaming videos or downloading photos from iCloud can be a frustrating experience if you don’t have a robust internet connection. You don’t want to have wait for ages to view your photos or videos. We’ve noticed about a one- to two-second delay when viewing a video on a 100-megabit connection.
To enable iCloud Photo Library, head to Settings > [Your Name] > iCloud > Photos. Toggle-On “iCloud Photos,” and then choose either optimized storage or to retain the originals on your device.
Once your photos are stored in iCloud, you can access them from any iPhone or iPad via the Photos app—just turn on iCloud Photos if they don’t show up. You can also head to iCloud.com and view them in a web browser or download the entire collection.
On a Mac, your media appears in the Photos app. On Windows, you can download iCloud for Windows to download your media to the desktop.
Store App Data on iCloud for Easy Access
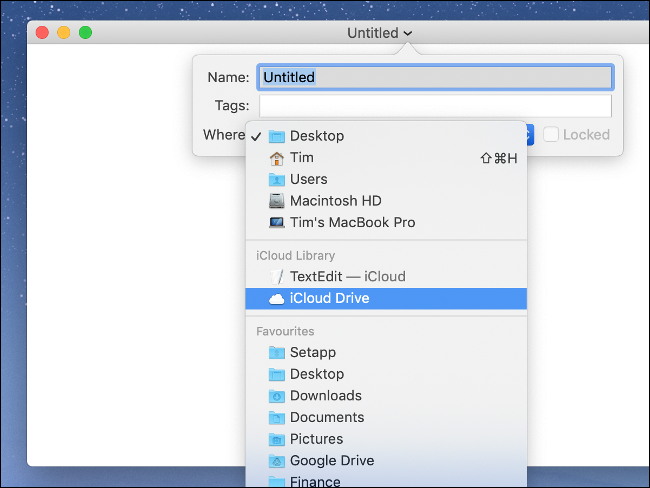
You might have noticed some apps (especially on a Mac) default to saving data to iCloud rather than the device. This includes apps like Pages and Numbers, GarageBand, and TextEdit.
If you’re not paying for additional iCloud storage, these projects can take up a precious amount of your 5 GB allotment. If you’ve got plenty of iCloud space to spare, though, why not make use of this feature?
There are a few good reasons why you might want to do this. When files are stored on the cloud, you can access them from any device that has an internet connection. Also, if you work on the cloud, any changes you make to a file will be pushed to all your devices, keeping everything synced, regardless of where you’re working from.
Cloud storage is a nice failsafe in case something happens to your local device. For example, if your laptop is damaged and you can’t access your files, you can still resume working via the cloud. Not only will you not lose your data, but there will also be less downtime.
On the other hand, you’ll need a decent internet connection to make the most of this feature. Pages documents and TextEdit files will work at just about any speed. However, larger project files, samples for GarageBand, or several gigs worth of iMovie clips are another matter.
If you use iCloud to store files like this, you can see and manage everything by browsing your iCloud Drive. On an iPhone or iPad, you can do this via Apple’s Files app.
On a Mac, open Finder and click “iCloud Drive” in the sidebar. Head to iCloud.com to access everything from a web browser.
iCloud for Windows doesn’t offer this functionality, unfortunately.
Store and Transfer Files via iCloud
Just like Dropbox, Google Drive, or any other cloud storage service, you can use your iCloud space as an extra drive on which to store files. This makes it easy to transfer files to devices over the web, which is especially handy when you’re away from your Mac or other devices.
On a Mac, click “iCloud Drive” in the Finder sidebar. From there, you can create folders and move files around just as you would with local data. You should also see the upload or download progress of any transfers you initiate.
On iPhone or iPad, you can use the Files app to access anything stored on your iCloud Drive. To upload files, you’ll have to use the “Share” option in the relevant app. Then, just select “Save to Files” from the list. You’ll be asked to choose a location before you save, and you can also create new folders.
On Windows, you can install iCloud for Windows, which adds native iCloud Drive access to Windows Explorer. You can then copy files to and from your iCloud Drive, and use it as you would any other cloud storage service.
On the web, you can access your entire iCloud Drive via iCloud.com. You can also organize or upload files, or create folders in the web interface.

If you want, you can share folders with others via their email address. Just click “Add People” on iCloud.com, or open Finder and head to Share > Add People in Files on iPhone or iPad on a Mac. Collaborators won’t need an Apple ID to access the folder.
Surprisingly, there are no limitations regarding the types of files you can store on iCloud. You can upload music, videos, ZIP archives, or entire comic books, provided each individual file is under 50 GB.
Related: How to setup IPTV on TVIP Box?
Free Up Space on Your Mac
If your Mac is getting low on space, you can manage your files automatically via iCloud. If you can offload some local files to the cloud, you can download them whenever you need them.
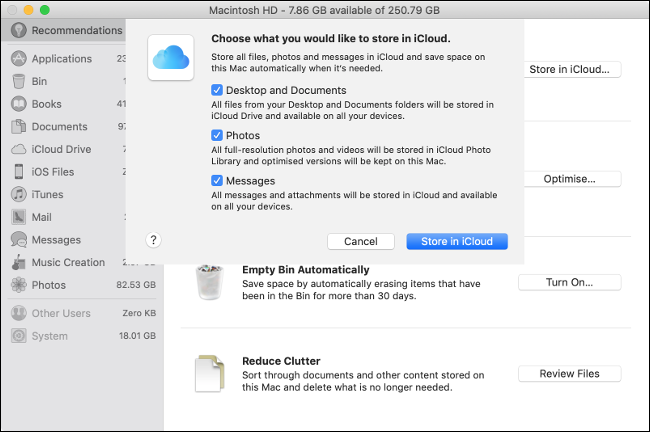
To do this, click the Apple logo, select “About This Mac,” and then click the “Storage” tab. Click “Manage . . .,” and then choose “Store in iCloud.” This frees up space by storing the files in your “Desktop” and “Documents” folders on the cloud instead.
The files will appear to remain in place, but they’ll have a Download icon next to them, indicating they’re stored remotely. Whenever you try to open a file stored on iCloud, your Mac will automatically download it. This feature also observes your usage and will only store recently opened files locally.
It’s a bit of a gamble to trust macOS and iCloud to handle this automatically. If this feature is enabled, you won’t have to micromanage your available space. However, if you’re caught without an internet connection, you could lose access to something important.
If you need even more space on a MacBook, there are plenty of ways you can increase it, including swapping out the drive or building a RAID array.
Share Your iCloud Space with Your Family
If you opt for the 200 GB or 2 TB iCloud tier, you can share your available storage with your family. First, you’ll need to set up Family Sharing, so you and your loved ones can share purchases, music, and more.
Next, head to Settings > [Your Name] > Family Sharing on an iPhone, and then tap iCloud Storage to purchase or share an existing plan. Any family members using the free 5 GB tier will automatically be able to use the new one.
If anyone in your family wants his or her own iCloud plan, they can opt-out and purchase their own instead. Your data and files will then remain separate and locked to the individual accounts.
Upgrade Your iCloud Plan Today
Still not sure whether you need to upgrade? Again, you get 5 GB of free storage when you sign up for an Apple ID. For most of us, though, this isn’t enough to back up a single device.
When it comes to upgrading, you can select one of the following three options:
- 50 GB: $0.99 per month, for individual use only.
- 200 GB: $2.99 per month, shareable via Family Sharing.
- 2 TB: $9.99 per month, shareable via Family Sharing
Remember that when you upgrade, you also get to keep your free 5 GB plan. So, a 50 GB plan is actually 55 GB, which is a nice bonus.
The only drawback is as you become more reliant on iCloud, the more “trapped” you become in the ecosystem. For example, once you outgrow the 50 GB tier, you’ll have little choice but to upgrade to the 200 GB, unless you want to lose access to all your backups, media, and storage.
For this reason, some people might prefer to keep their iCloud usage at a minimum.


Leave a reply