How to Take Better Photos in Your Home (No Flash Needed)
How to Take Better Photos in Your Home (No Flash Needed) :Photography is often seen as an outdoor hobby. Think of landscape photographers roaming through mountains and woods for a sunrise shot. But really, photography can be done anywhere. And indoors, at home is one of the best spots. Here’s how you can get started.
Understand the Light
Photography is all about working with light. The better the light, the easier it is to take great photos. While there’s no such thing as “bad” light, some types are definitely easier to shoot in than others.
For example, take artificial overhead indoor lighting (like your kitchen light). It’s really hard to take a flattering portrait when the main light source is hanging directly above your subjects’ head. His nose, eyebrow ridge, and lips will all cast deep shadows over his face. Try it on yourself with a selfie.
This kind of light is just as unflattering for other types of photos. Food shots look weirdly dramatic and contrasty. It’s also too dark for good close-ups. This isn’t to say you can’t ever take good photos in direct, overhead lighting—you just really have to work for them. You also need to know exactly what you want. Managing the harsh shadows is challenging.
If you think taking photos indoors is all about using this kind of light, you’d be wrong. There’s a better, easier source of light readily available in almost every home: natural window light.
Natural window light is, hands down, some of the easiest, most subject-flattering light to work with. I’d much rather work with it than direct sunlight outdoors.
Windows are awesome because they’re a large, indirect source of light that’s roughly level with your subjects. Any diffuse shadows are cast behind the subject, which makes it look three dimensional. It’s all very gentle and easy to work with.
So, what’s the ideal window for home photography? Try to find one in your home with all the following traits:
- Big: The bigger, the better. A bigger window lets in more light for you to work with.
- Not in direct sunlight: Choose a window away from direct sunlight. You want diffuse, reflected light.
- Enough space for you to work: There’s no point in having a great source of light if you can’t get in front of it. Look for a window that has enough space around it.
Take Great Portraits and Selfies
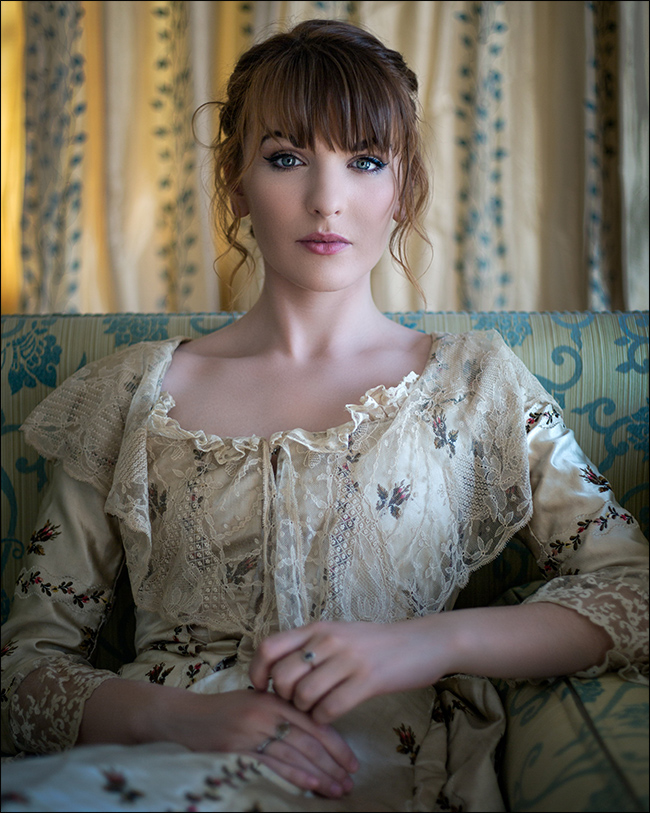
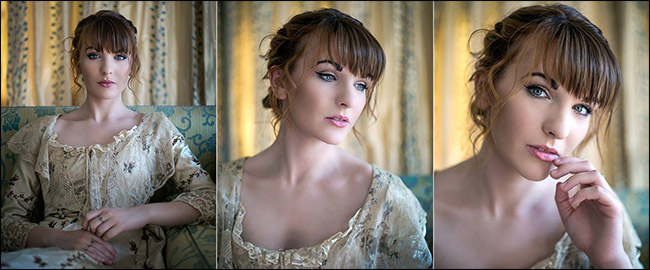
The great indoors is one of the best places to shoot a portrait because natural window light is perfect for them. It really flatters people.
All the usual advice for taking portraits applies, including the following:
- If you have a portrait lens, use it: Although, any lens or camera will work.
- Use Aperture Priority mode and set the aperture as wide as it will go: Somewhere around f/1.8 to f/2.8 is best. If your lens only goes to f/5.6, though, that’s fine, too. Set the camera’s ISO to Auto, and you’re ready to shoot. (Ignore this step if you’re using a smartphone).
- Use a tripod for self-portraits: This allows you to use a remote shutter release or shutter timer.
That’s about it! Move around and see how the different angles of light affect your shots. Have your subject stand closer to the window, and then try farther away. Use your total control of the space and have fun.
Best of all, don’t forget to play dress up! The woman in the image above is a friend of mine wearing my great-great-grandmother’s dress.
Zoom in on Everyday Life

Macro photography is all about seeing small things up close, and it’s really easy to do at home. In fact, unless you’ve got thousands of dollars of gear, your home is by far the best place to do it.
To get started, you’ll need a cheap set of extension tubes so you can turn your regular lens into a macro lens. They cost about $10, and you can get them for Canon and Nikon cameras.
The best thing about macro photography is it lets you see everyday things from a totally new perspective. Salt crystals, the thread-pattern in your tablecloth, or even the crust of some freshly baked bread, all look totally different when magnified a few dozen times.
Set up a table in front of your photo window. If you’ve got a tripod, it makes this much easier, but you can still try some macro photography without one.
Grab a few different objects from around your home and get shooting! For the best results, look for things with interesting textures. In our more detailed guide to macro photography, Jason got some really interesting close-ups of a $5 bill.
Even if you don’t have the gear to take macro photos, you can still play around with the same ideas. Try your hand at still-life or abstract photography. Some textures look awesome at any magnification.
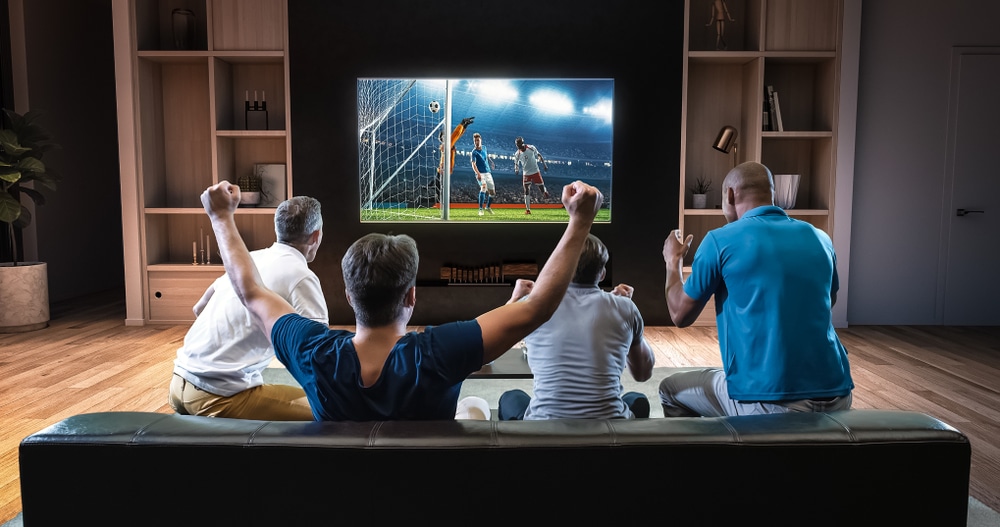
MainIPTV Forum RELATED: Fire stick set Up
Use Your Control to Take Great Composites
Unless you’re a professional photographer, most of the time you shoot, you don’t have a lot of control over the space in which you’re working. You do when you’re at home, though—and you can get a lot of use out of it.
Composite images are multiple photos and digital processing techniques used to create a single image. Almost all advertising photos are composite images, for which the subject, background, and product are photographed separately, and then combined later in Photoshop.
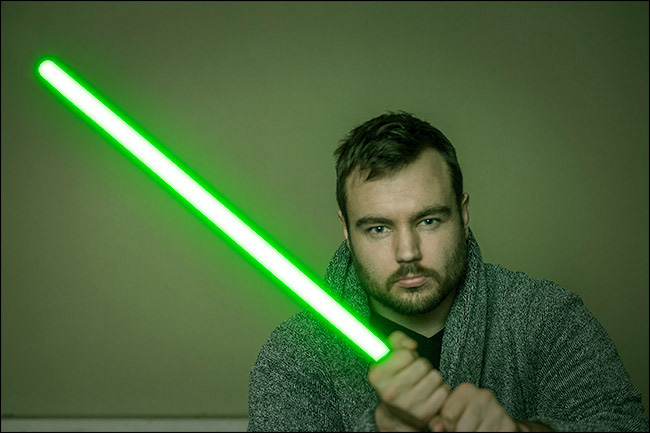
A good example is adding a lightsaber to any image. This fairly simple composite just requires a bit of time in Photoshop. However, you can use the same tools and techniques to make it appear that you’re levitating, fighting a bear, or that your child is in a dangerous situation.
Making a good composite image takes a bit of work and space, which is why these are perfect to do at home. Just put aside a day, and set up everything in front of your favorite “photo window.”

In addition to your photography skills, you’ll also need a decent understanding of some Photoshop features to create a good composite image. A few of the most important features are how to use layers and masks, as well as removing people and objects.
If you aren’t quite up to scratch yet, check out our guide on Photoshop. For more composite-specific advice, we recommend Phlearn.
RELATED: What is Globmall 4K?
Other Ideas
Portraits, macro photography, and composites are just a fraction of the stuff you can have fun shooting at home. For example, you could go all-in on food photography, turn your pets into Instagram stars, or play around with dyes and water. It’s up to you!
Just remember, photography doesn’t have to happen outdoors. There’s always great light source you can work with—even at home.


Leave a reply