
How to Skip the Recycle Bin for Deleting Files on Windows 10
How to Skip the Recycle Bin for Deleting Files on Windows 10: Windows 10 normally sends files you delete to the Recycle Bin. They’ll be kept until you empty it—or, in some cases, until Windows 10 automatically empties your Recycle Bin. Here’s how to skip the Recycle Bin and delete files immediately.
This doesn’t necessarily “permanently delete” files. Your deleted files may still be recoverable, especially if you’re using a mechanical hard drive and not a solid-state drive. We recommend using encryption to protect all your files—with full-disk encryption, people can’t recover your deleted files without also bypassing the encryption.
How to Delete One or More Files Immediately
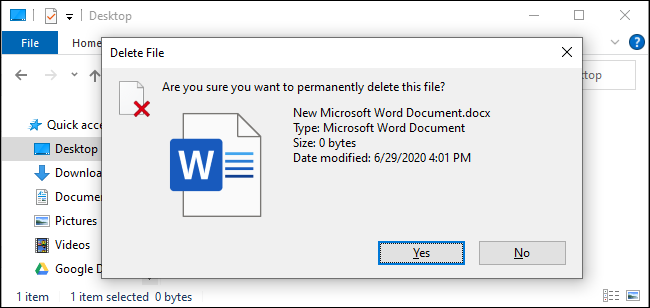
To delete a file, folder, or multiple files and folders immediately, select them in File Explorer and press Shift+Delete on your keyboard.
You can also right-click the files, press and hold the Shift key, and click the “Delete” option in the context menu.

Windows will ask you if you want to permanently delete the file. Click “Yes” or press Enter to confirm.
You won’t be able to recover files from the Recycle Bin if you delete them in this way.
How to Always Skip the Recycle Bin
You can also tell Windows to stop using the Recycle Bin in the future. To do this, right-click your “Recycle Bin” icon and select “Properties.”

Enable the “Don’t move files to the Recycle Bin. Remove files immediately when deleted.” option here.
Note that Windows uses different Recycle Bin settings for different drives. For example, if you delete a file on drive C:, it goes to the Recycle Bin on drive C:. If you delete a file on drive D:, it goes to the Recycle Bin on drive D:.
So, if you have multiple drives, you’ll need to select them all in the list here and change the setting for each drive you’d like to change it for.
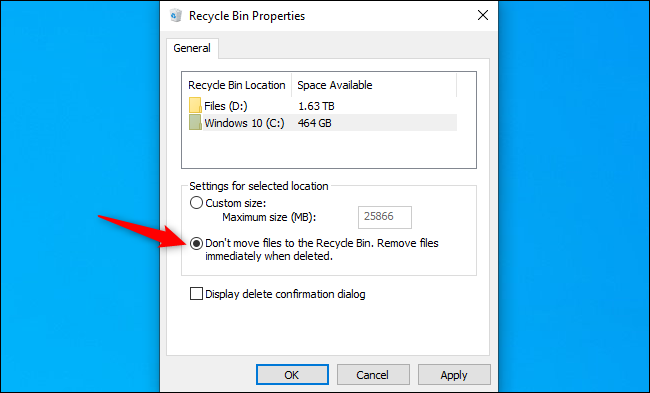
Click “OK” to save your settings.
Beware: Any files you delete in the future will immediately be deleted, just as if you had used the Shift+Delete option. If you accidentally press the Delete key with some files selected, they’ll vanish immediately and you won’t be able to get them back.
For this reason, you might want to activate the “Display delete confirmation dialog” option. You’ll be asked to confirm your choice every time you delete files.
RELATED: How to Set Default File Drag and Drop Behavior on Windows 10


Leave a reply