How to install Smart STB app on Smart TV?
Table of Contents
How to install Smart STB app on Smart TV? Smart STB is an android app which can be installed on Samsung and LG smart tv`s. This app enables you to have IPTV service on a portal just like MAG setup boxes with all characteristics that can be expected from MAG and Stalker Portal. What is MAG?

Features of Smart STB
- MAG 250 Based Platform
- Categorized live tv list
- Categorized on-demand list
- Electronic Program Guide (EPG) supported
- Program Icons (Picons)
- Fast channel buffering
Activation of the Trial period
Step 1: From the app market on your smart tv search, find and install Smart STB App.
After that, we can initiate the time for testing. To do that we first need to discover the Software MAC Address which is required for application activation on Smart-STB site. What is the MAC address?
To find Software MAC address do as instructed below:

Now select “System Settings“.
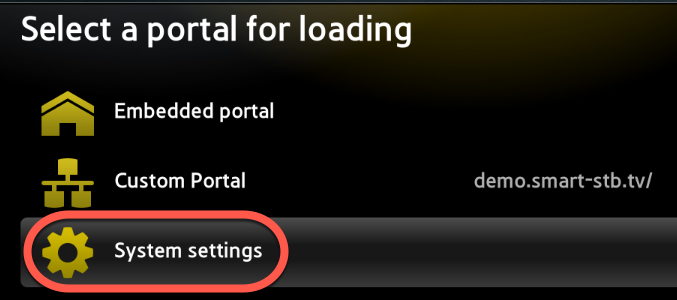
Now select “Device Info“.

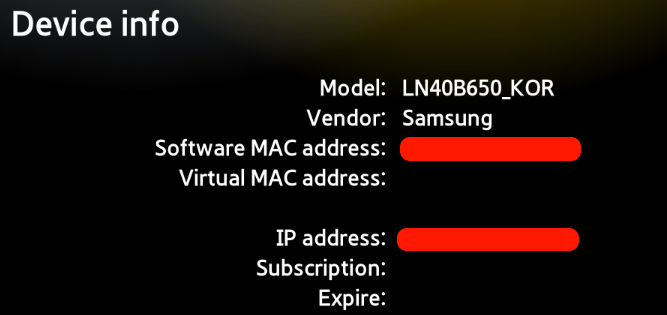
Here you will be presented with a few information about the device and the Mac addresses.
Software MAC address which is required for app activation on Smart-STB website.
Virtual MAC address which is required for IPTV service activation on your IPTV provider server.
Step 2: Now that we understand the needed MAC address info, it is time to activate the app trial period. First, log onto the trial activation page of Smart-STB website by opening this URL https://smart-stb.net/index.php?_url=/order/unlock-custom-portal-for-smart-tv.
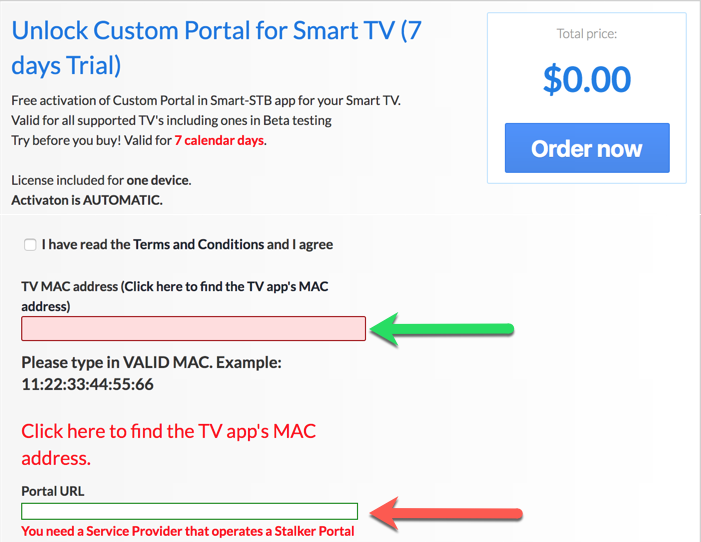
Opening the link provided above should show you the earlier picture. The green arrow shows the proper field for entering Software MAC Address. The red arrow shows the field in which we can enter the stalker portal URL of your IPTV provider. It can both be entered from here or later from the app on your TV. Remember to check the Terms of Service box before finishing up. In the end, click on Order Now.
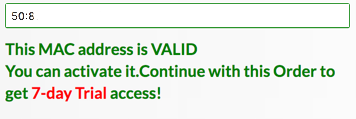
If you implement the correct information and add the correct Mac address, the following message in the green text should show up.
Step 3: You require to register on their website eventually. So if you have not registered at the moment, we recommend that you do. https://smart-stb.net
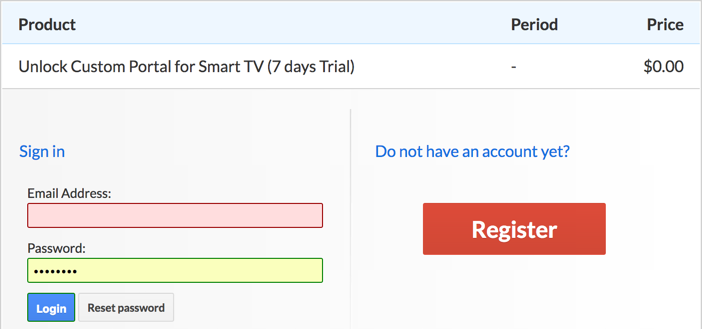
Now click on “CheckOut“.
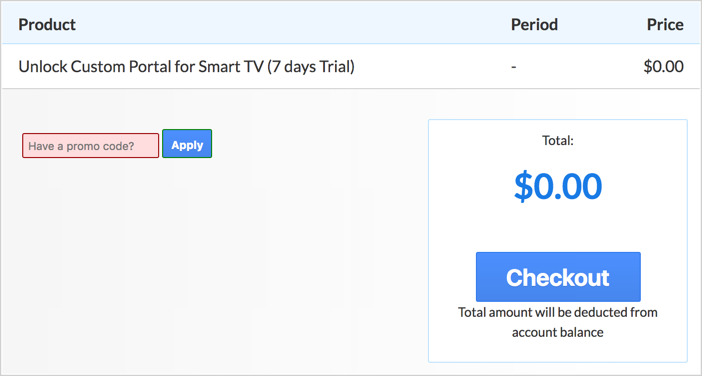
Now as you can see, Order Status is set as Active meaning the trial period has started.
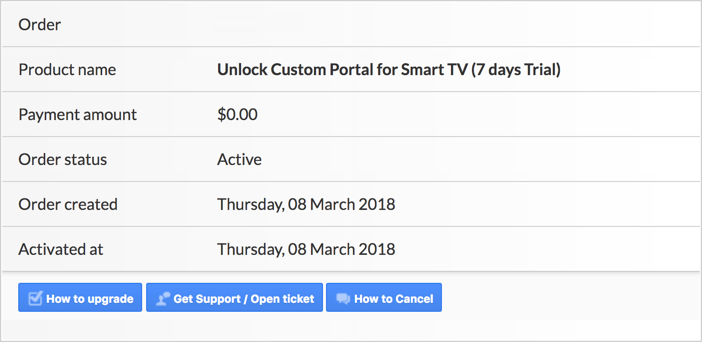
Now if you head back to the “Device Details” page of the app on your TV where we previously visited, you`ll see the trial has started and an expiry date is indicated.

Activation of the paid licenses
Considering that Software MAC address and account registration on the Smart-STB side has already been done, upgrading to a paid license is very simple and easy.
Step 1: Log onto the smart-STB website and log into your account.
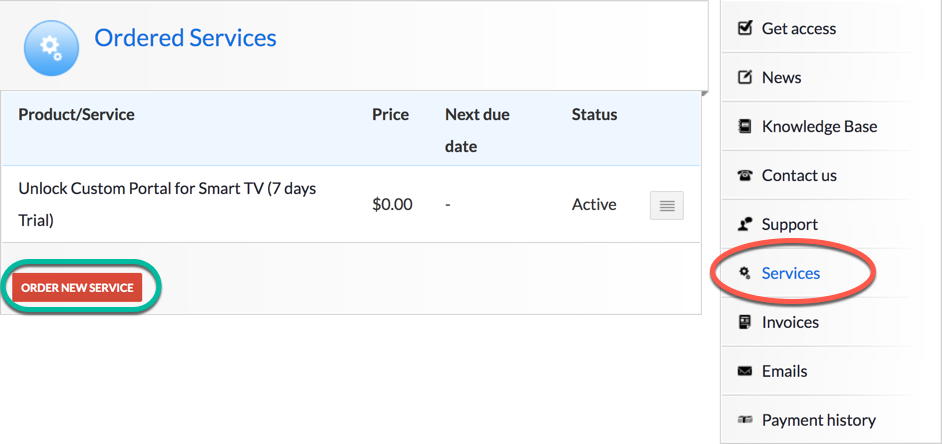
Step 2: From the left menu, click on “Services“. The free 7 days trial we activated earlier is listed. Now let`s add a paid license starting by clicking on “Order New Service“.
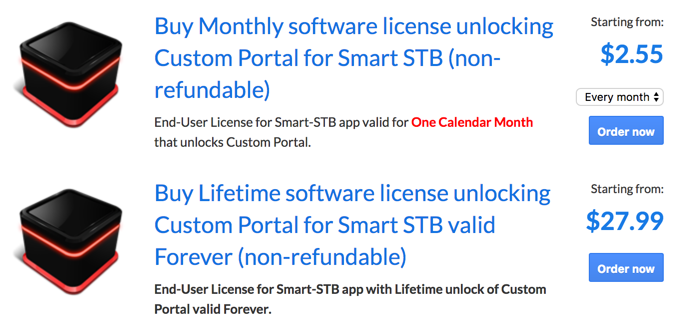
Step 3: These are the following paid monthly and yearly licenses to which you can subscribe.
For example, if you subscribe to the lifetime package, the subscription status in the device info page will change to Paid and expire to Never since it is a lifetime subscription.
Installation of IPTV Stalker Portal
Now that the app has is activated, we need to input an IPTV sourced from a provider of your choice. From the device Info page of the app, find Virtual MAC address and send it to the IPTV provider. They should register the MAC address on their system and provide you with a stalker portal URL. Once the portal URL is received, follow these steps to input it into the app:
Just like the first time we did it above at the beginning of this tutorial, right after Loading Portal sign shows up, press enter. Then go to System Settings. Now choose Portal as we need to input the portal URL. You can ask for an MAG portal from your IPTV provider.
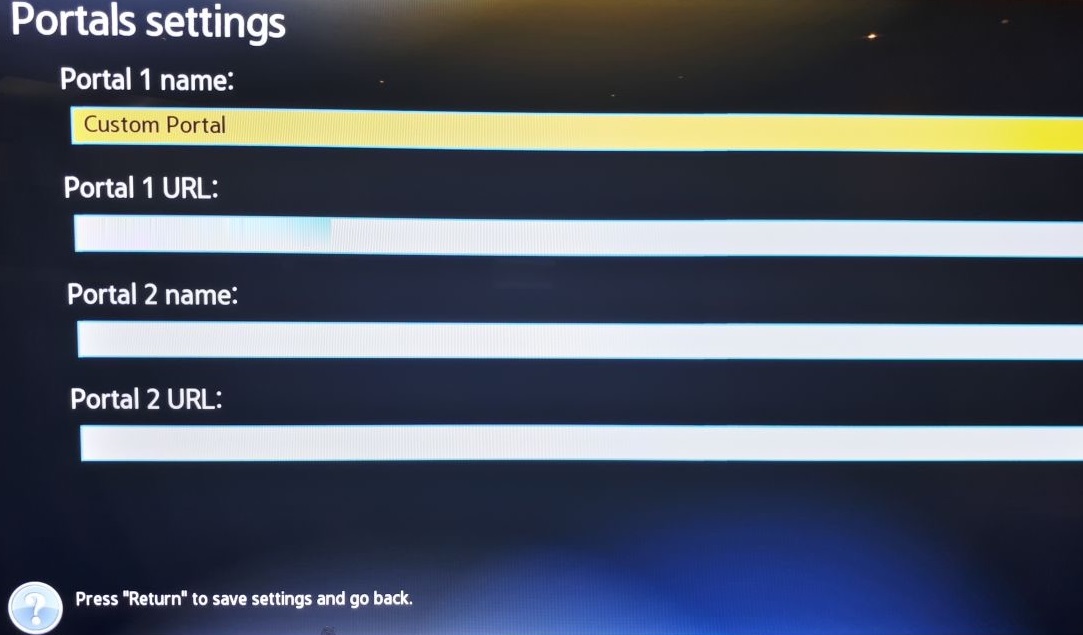
You should see the Portal Settings page like the earlier picture. In Portal 1 URL type the desired name for the main portal and in Portal URL input the URL you have been provided by the IPTV Provider you are subscribed to. Once done, press the Return button on the remote controller. Going back to the preceding page, Restart Portal must be selected. Next time you start the app, IPTV portal should load with bouquets and details of IPTV service ready to be used.
Let us know in the comments section below about your opinion and feedback concerning this article and help us improve the quality of our articles. Thank you in advance.


Leave a reply