How to Add AirDrop to the Favorites Sidebar in Finder on Mac
How to Add AirDrop to the Favorites Sidebar in Finder on Mac: Apple’s AirDrop is a handy way to transfer files between Macs, iPhones, and iPads. By default, it usually sits in the Favorites sidebar in Finder on macOS, but it can easily be removed by dragging it away. Luckily, it’s easy to add it to Favorites again if you accidentally misplaced it.
Before you begin
- Make sure that the person you’re sending to is nearby and within Bluetooth and Wi-Fi range.
- Check that you and the person you’re sending to have Wi-Fi and Bluetooth turned on. If either of you have Personal Hotspot on, turn it off.
- Check if the person you’re sending to has their AirDrop set to receive from Contacts Only. If they do, and you’re in their Contacts, they need to have your email address or mobile number in your contact card for AirDrop to work.
- If you’re not in their Contacts, have them set their AirDrop receiving setting to Everyone in order to receive the file.
You can put your AirDrop receiving setting to Contacts Only or Receiving Off at any time to control who can see your device and send you content in AirDrop.
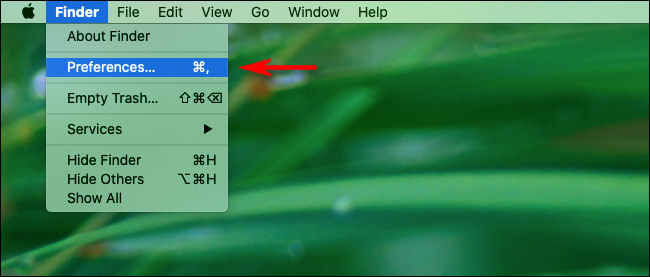
First, click the desktop to bring Finder into focus. Click “Finder” in the menu bar, and then select “Preferences” from the menu.
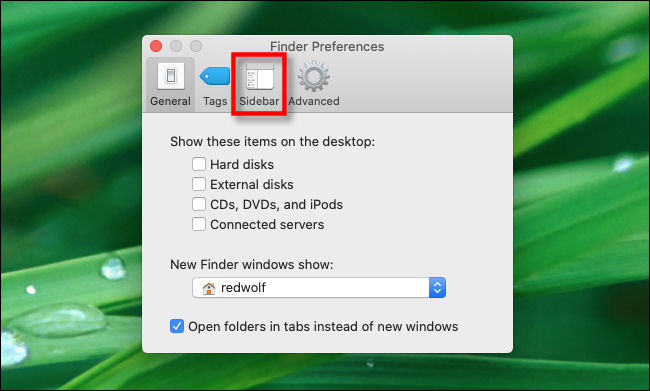
In “Finder Preferences,” click the “Sidebar” tab.
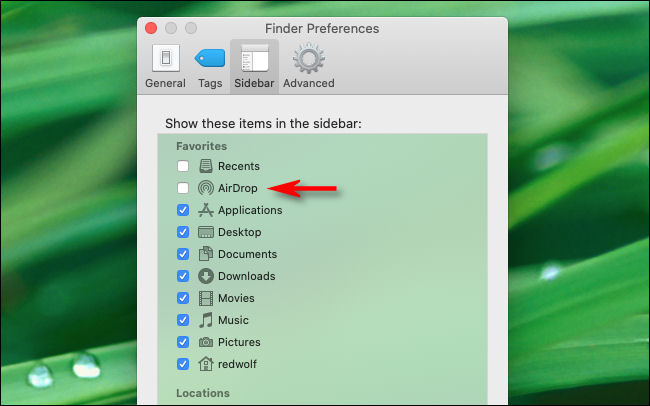
In the “Show These Items in the Sidebar” section, select the checkbox next to “AirDrop.”
Now, when you open a new “Finder” window, AirDrop should be restored to the “Favorites” section of the sidebar.
To move AirDrop and other entries up or down in the Favorites list, just drag and drop them where you want them.
RELATED: How to download and install macOS 11 Big Sur right now


Leave a reply