How to Type Emoji on Your Mac with a Keyboard Shortcut
Your Mac has a quick hotkey that will open an emoji picker in any app. You can quickly insert an emoji anywhere on macOS—in a messaging app, in an email, or even in a document you’re editing. Here’s how to use it.
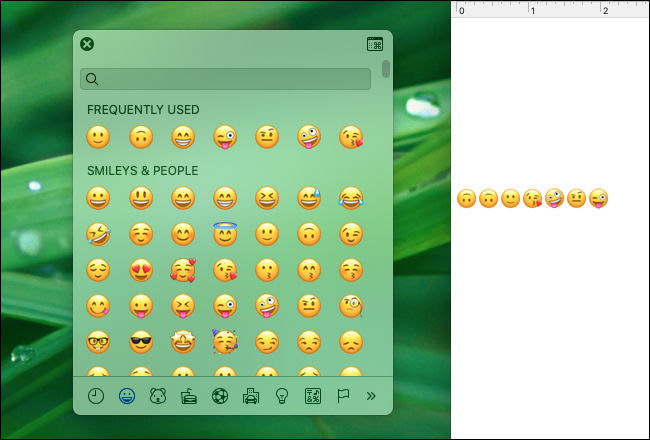
First, open the app you’d like to insert the emoji into. Click on any text input area, and when you see a cursor, press Control+Command+Space. An emoji panel will pop up.
In the emoji panel, click the emoji you want to use, and it will appear in the app.
You can also search for emoji using the search box. Click the box and type a description of whatever you’d like. For example, you could type “fire” and see all fire-related emoji.
When you find the one you want, click it, and it will appear in the app.
You can also drag the emoji panel pop-up off into its own independent window that stays open even after you pick an emoji. That way you can click an emoji any time you’d like, and it will be inserted into the app you’re using.
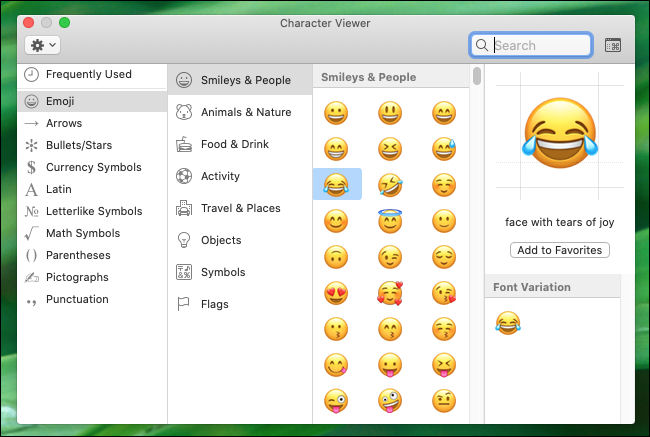
And finally, if you’d like to browse through emojis by category or see each one in more detail, press the tiny “Emoji & Symbols” button in the emoji window. (The button looks like an icon of a tiny window with a “Command” symbol inside it.)
The emoji window will expand into the Character Viewer, and you will see more options for browsing, searching, and choosing emoji.
To return to the small emoji picker window, click the “Emoji & Symbols” button that’s located just beside the search bar.
If you find yourself using emojis frequently, you can also add an emoji panel button to your menu bar. To do so, open “System Preferences,” and click “Keyboard.” Then click the keyboard tab and put a check in the box beside, “Show keyboard and emoji viewers in menu bar.”
Have fun with emoji!
RELATED: ✨ You Can Use Emoji in File Names on Windows 10
By the way, if you want to quickly insert emoji on a Windows PC, Windows 10 also has a keyboard shortcut for inserting emoji.


Leave a reply