
How to Insert a Word File into a Different Word Document
How to Insert a Word File into a Different Word Document : If the content of another Microsoft Word document is relevant to the content in a Word doc you’re currently working on, you can embed or migrate the text of that document into your current document. Here’s how.
First, open the Word document that you would like to add the contents of, or embed, another Word document to.
RELATED: How to Open a PST File in Microsoft Outlook
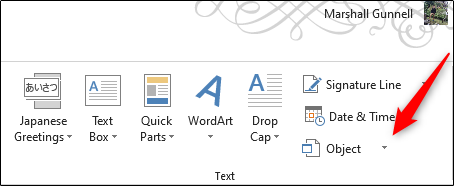
Next, head over to the “Text” group of the “Insert” tab and click the down arrow next to the “Object” option.
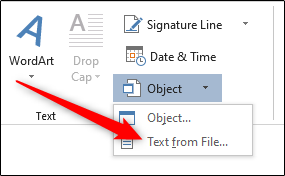
A drop-down menu will appear. There are two options to choose from here: “Object” and “Text From File.”
- Object: Embeds an object such as a Word document or Excel chart
- Text From File: Inserts the text from another file into your Word document
The “Text From File” option is essentially a quicker way to copy and paste the content of another file into this one.
Try it out by clicking the “Text From File” option in the drop-down menu.
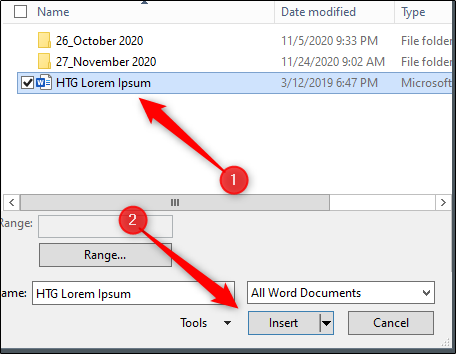
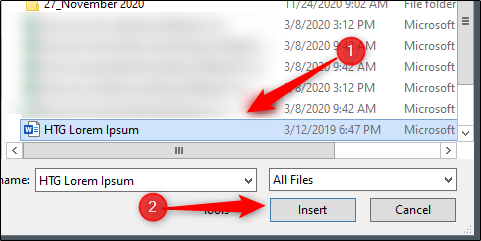
File Explorer (Finder on Mac) will open. Find the file you would like to copy the text from, select it, then click “Insert.”
The contents of that Word doc will now appear in the current Word document. This works well if there isn’t a lot of content in the other Word document, but if there is, embedding it may be a better option.
Back at the “Object” drop-down menu (Insert > Text group > Object), click the “Object” option.
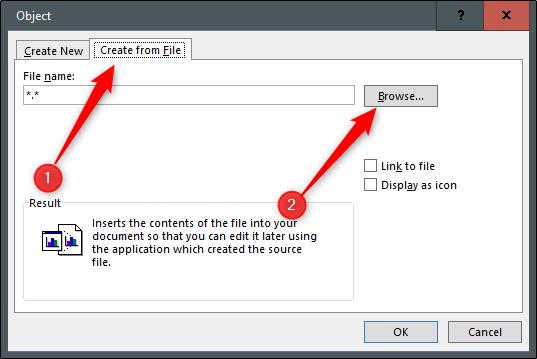
The “Object” window will appear. Select the “Create From File” tab and then click “Browse.” The “Create From File” option will appear as a button in the bottom-left corner of the window on Mac.
File Explorer (Finder on Mac) will appear. Find the file you want to embed, select it, then click “Insert.”
The file path of the selected file will now appear in the text box next to “Browse.” Now, you need to decide how you want to insert the object. You have two options:
- Link to File: Inserts the contents of the selected file into your Word document and creates a link back to the source file. Changes made to the source file will be reflected in your document. Selecting “Link to File” by itself will insert the content of the other file inside a text box.
- Display as Icon: Inserts an icon to show the reader that there is an embedded object. This is ideal when saving space is imperative.
We’ll check both options in this example.

The file will now be embedded in your Word document. Double-clicking the icon will open the second Word file.
One caveat with this method is moving the source file would break the embedded object’s link. For this reason, Microsoft prevents you from being able to move the source file to a different location. If you try, you’ll receive this message:
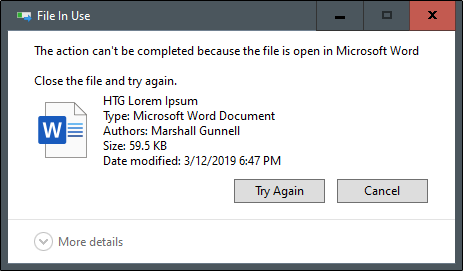
If you need to move the source file to another location, you’ll need to remove the embedded link, move the source file, and then re-embed the file following the steps in this article.


Leave a reply