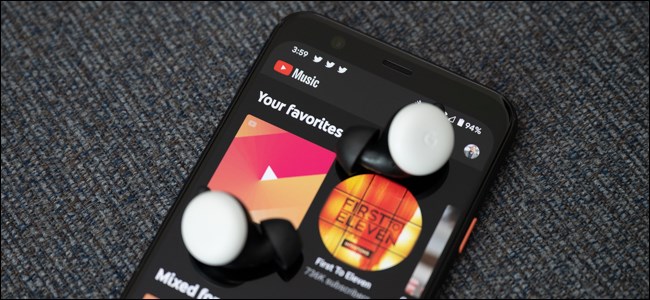
How to Enable High-Quality Audio Streaming in YouTube Music

YouTube Music Premium subscribers have the option to adjust the audio streaming quality on their mobile devices and on their computers. As everything is set to “Normal” by default, you’ll want to increase the quality, especially while listening at home.
Before we get started, let’s talk about YouTube Music’s streaming quality options. As laid out on a Google support page, you can choose from Low, Normal, High, and Always High. The default option, Normal, has an upper bound of 128 kbps AAC. Switching to High moves you to an upper bound of 256 kbps AAC.
If you’re not worried about a data limit, we recommend choosing High as it improves the quality of your streaming service. But if you have a small data cap, you can always limit the quality on mobile networks and increase the quality while on Wi-Fi.
One more thing; changing the audio quality on you smartphone won’t adjust the sound setting on your computer (and vice versa). You will need to go into YouTube Music’s Settings menu on all of your devices to configure your desired streaming quality.
Turn on High-Quality Streaming on Android
Start by downloading and then opening the YouTube Music app on your Android device. From the home page, tap on your avatar in the top-right corner.
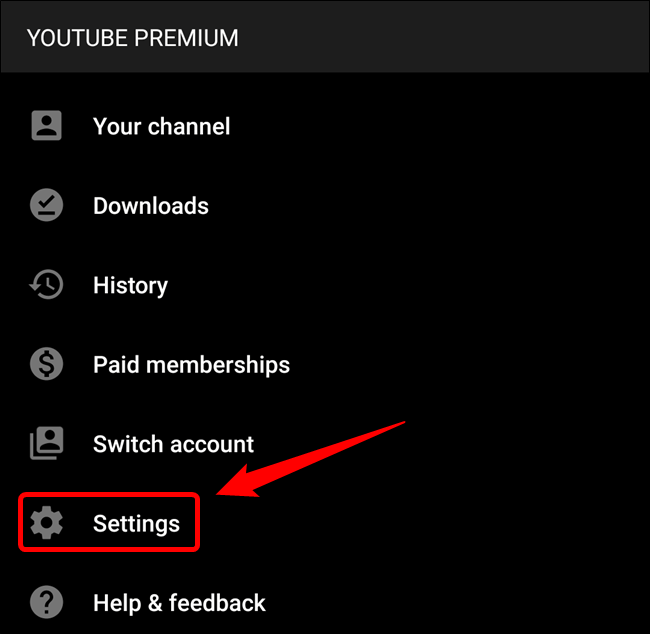
Next, select the “Settings” button.
Choose the “Audio Quality On Mobile Network” or “Audio Quality On Wi-Fi” option.
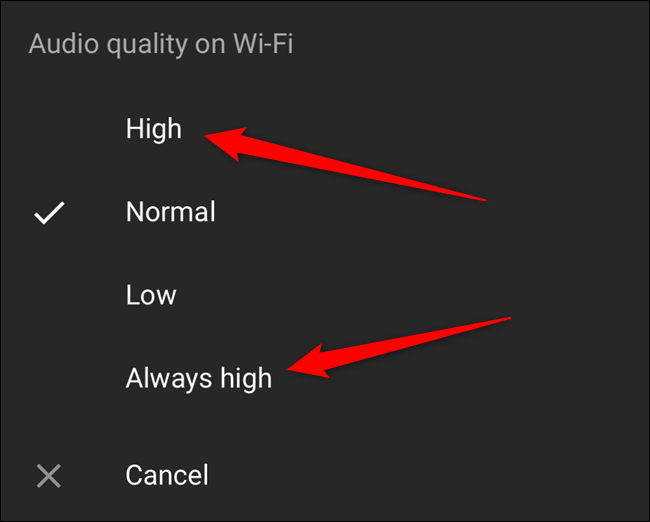
Finally, select the streaming quality option that you want to use on your Android handset.
Choose “Always High” if you want to force the highest quality stream, even when your connection is poor.
Turn on High-Quality Streaming on iPhone and iPad
The process for changing the streaming music quality on iPhone and iPad is slightly different than on Android. Oddly enough, Google included an additional Settings page you’ll have to tap through.
Start by downloading YouTube Music from the Apple App Store and opening it on your iPhone or iPad. From there, select your profile picture in the top-right corner of the app.
Next, tap the “Settings” button.
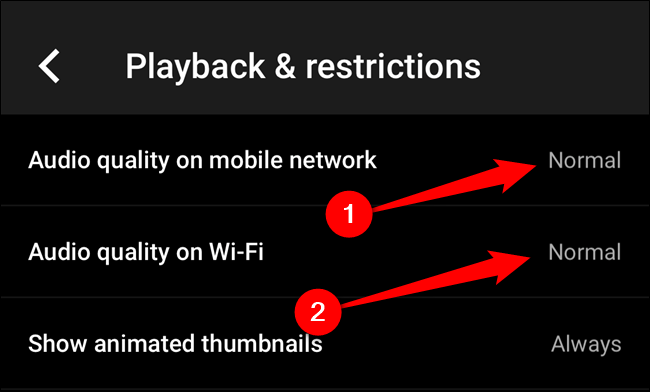
Now, select the “Playback & Restrictions” option.
You can now choose to adjust the “Audio Quality On Mobile Network” or “Audio Quality On Wi-Fi.”
Select your desired setting.
As with on Android, choosing “Always High” forces the best streaming quality even when your iPhone’s or iPad’s network quality isn’t strong.
Turn on High-Quality Streaming on Your Computer
Changing your audio quality setting is a much more simple and streamlined experience on your computer. Start by visiting YouTube Music’s website in your browser of choice (and signing into your Google account associated with your subscription if necessary).
Next, click on your avatar in the top-right corner of the window and then select “Settings.”
Click the “Audio” tab from the pop-up window and then select the drop-down menu found to the right of the “Audio Quality” listing.
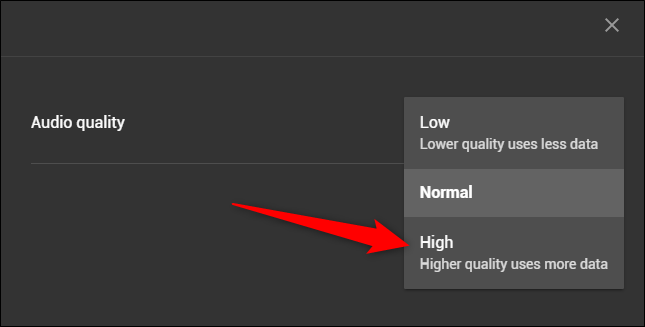
Finally, click the “High” option to get the best music streaming experience available.
RELATED: What is Nvidia SHIELD TV?







Leave a reply