How to Disable File Thumbnails on Windows 10
How to Disable File Thumbnails on Windows 10: Even in our age of speedy PCs, many people use removable or networked drives that can be frustratingly slow to browse—especially if we have to wait for each new file thumbnail to load in File Explorer. Luckily, it’s easy to speed up file browsing by disabling thumbnails completely. Here’s how.
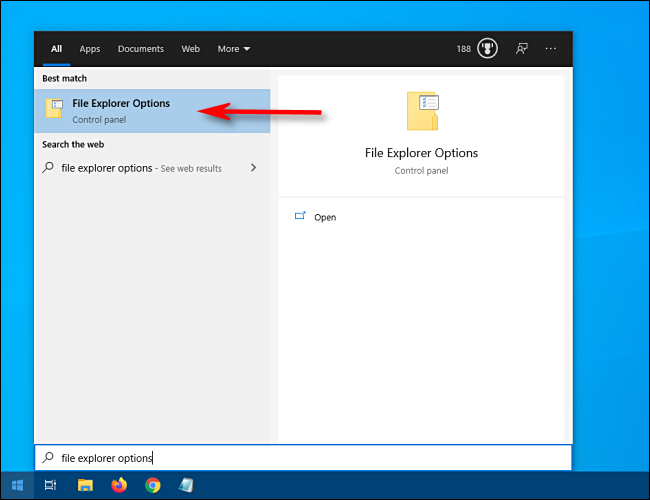
First, open the “Start” menu and type “File Explorer Options.” Click the first result.
(Or, you can open a File Explorer window and select View > Options in the menu bar.)
In the File Explorer Options window that appears, click the “View” tab. In the “Advanced Settings” area, click the checkbox beside “Always show icons, never thumbnails.” Then, click “OK.”
If you’d like, open up a folder full of documents or images to test the new setting. You should only see standard icons for each file instead of thumbnails, which will very likely speed up your future file browsing experience.
If you ever change your mind and want thumbnails back, just revisit File Explorer Options and uncheck the box beside “Always show icons, never thumbnails.” That`s How to Disable File Thumbnails on Windows 10.
RELATED: How to Disable the Screenshot Preview Thumbnails on a Mac


Leave a reply